
How to Stop Sweating Vents: A DIY Guide to Proper HVAC Sealing for a Healthy Home
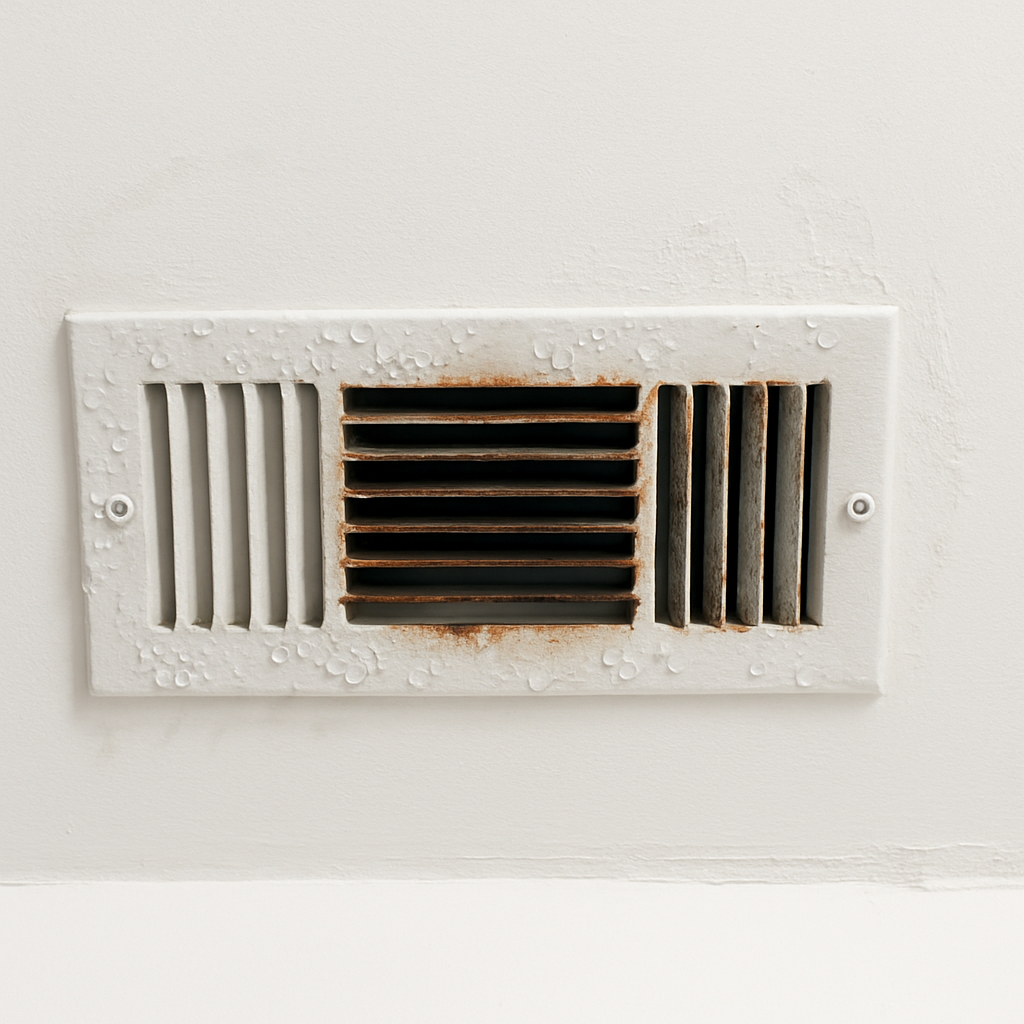
As a vigilant DIY homeowner in the US, you strive to maintain a comfortable and healthy living space. But have you ever noticed unsightly moisture, water droplets, or even dark stains forming around your AC vents, especially on humid days? This common phenomenon, known as "sweating vents" or condensation, is more than just a cosmetic nuisance. It's a silent indicator of potential issues that can compromise your home's air quality, structural integrity, and even drain your energy efficiency. Understanding how to properly seal and insulate your vents is a crucial step towards ensuring a dry, healthy, and efficient home environment.

The Silent Culprit: Why Your AC Vents Are "Sweating" and What It Really Means
Vent sweating is a direct result of physics: it occurs when warm, humid air in your room comes into contact with the much cooler surfaces of your HVAC ductwork or the edges of the vent itself. This temperature difference causes the moisture (humidity) in the air to condense into liquid water droplets. The primary culprit is often the connection point where the air vent meets the plenum box (the distribution chamber connected to your main ductwork).
The consequences of consistent vent sweating extend far beyond an unsightly appearance:
- Mold & Mildew Growth: Persistent moisture creates an ideal breeding ground for mold and mildew. These fungi can grow on drywall, insulation, and within your ductwork, leading to musty odors and releasing spores into your indoor air, which can trigger allergies, asthma, and other respiratory issues.
- Structural Damage: Continuous water dripping can cause severe damage to your ceilings, walls, and paint. This leads to unsightly water stains, peeling paint, softening drywall, and potentially costly repairs.
- Reduced Indoor Air Quality: Mold spores and trapped dust, exacerbated by moisture, are circulated throughout your home by your HVAC system, directly compromising your indoor air quality (IAQ).
- Inefficiency: While not a primary energy drain, condensation can indicate poor insulation around the ductwork, indirectly contributing to less efficient cooling as cold air "leaks" or transfers temperature before reaching your living space.
- Compromised Aesthetics: Water stains and visible mold growth around your vents drastically detract from your home's carefully curated aesthetic.
Common Approaches to Condensation: The Importance of Proper Insulation
The HVAC industry universally recognizes that controlling condensation is about managing temperature differences and moisture. General solutions revolve around improving insulation and sealing.
- Ductwork Insulation: The most common practice is to insulate the ductwork itself. While essential for overall HVAC efficiency and preventing widespread sweating within the ducts, this often overlooks the critical connection point where the air vent meets the plenum or the ceiling/wall opening. This specific area, if not properly sealed and insulated, remains a weak point.
- Dehumidifiers: Using a dehumidifier can reduce overall room humidity, which lessens condensation. However, this addresses the symptom (high humidity) rather than the localized cause of sweating around the vent connection itself. It's a supplementary tool, not a direct fix for poorly sealed vents.
- Painting Over Stains: A quick cosmetic fix that completely ignores the underlying moisture problem. The condensation will return, causing more damage and potentially hiding mold growth behind a fresh coat of paint.
While these general methods are part of a good HVAC system, they often fail to specifically target the persistent condensation at the vent-to-plenum connection, which requires a precise and dedicated sealing solution.
GREEN VENT's Advanced Solution: How Proper Sealing Protects Your Investment

At GREEN VENT, we provide premium aluminum air vents (like Linear Slot Diffusers, Air Return Grilles, and Gable Vents) that are rust-proof, durable, and designed for optimal airflow and aesthetics. However, even the highest quality vent needs proper installation and sealing to perform its best and prevent environmental damage. Properly insulating and sealing the connection point between your GREEN VENT air vent and the plenum box is a vital DIY step that ensures:
- Maximum Performance of Your Aluminum Vents: A sealed connection ensures all conditioned air flows directly into your room, maximizing your GREEN VENT's airflow efficiency and your HVAC system's performance.
- Protection for Your Quality Investment: By preventing condensation, you safeguard your beautiful, rust-proof GREEN VENT aluminum vents from external moisture that could lead to staining on surrounding walls, maintaining their pristine appearance and extending their aesthetic lifespan.
- A Healthier Home Environment: Eliminating the source of condensation at the vent directly prevents mold and mildew growth, contributing to significantly cleaner indoor air quality.
Tangible Rewards: The Benefits of a Properly Sealed Ventilation System
Taking the time for this simple DIY sealing project offers significant, lasting benefits for your home and your wallet:
- A Healthier, Mold-Free Home: The most crucial benefit is preventing mold and mildew growth around your vents and within your ductwork. This eliminates a common source of allergens and respiratory irritants, ensuring cleaner, fresher air for your family.
- Preserved Home Aesthetics & Value: Say goodbye to unsightly water stains, peeling paint, and damp spots around your vents. A properly sealed connection keeps your walls and ceilings pristine, maintaining your home's aesthetic appeal and preserving its property value.
- Extended Lifespan of Your Vents & HVAC Components: By preventing moisture intrusion, you protect both your GREEN VENT aluminum air vents from external damage and your HVAC ductwork from corrosion and degradation, ultimately contributing to a longer, more efficient life for your entire ventilation system.
- Improved Comfort & Efficiency (Indirectly): While sealing a single vent connection might not drastically cut your energy bill, it's a crucial part of an airtight, well-insulated HVAC system. This contributes to more consistent temperatures and prevents moisture-related issues that can indirectly affect efficiency.
- Peace of Mind for DIY Homeowners: Successfully tackling this common home problem yourself provides a sense of accomplishment and ensures your home is protected from hidden moisture issues, all with minimal cost.
Your DIY Guide: Sealing Vents to Plenums to Prevent Sweating
This simple project requires minimal tools and materials. The primary material you'll need is insulation tape (also known as duct insulation tape or foam insulation tape), which is designed for HVAC applications.
Step-by-Step Installation Process:
- Turn Off the HVAC System: This is the crucial first step. Turning off your heating and cooling system allows the plenum box and ductwork to dry completely.
- Remove the Air Vent & Clean the Area: Carefully unscrew and remove your GREEN VENT air vent from its opening. Gently wipe away any dust, debris, or existing moisture from the exposed edges of the plenum box and the surrounding wall/ceiling with a clean, dry cloth. Ensure the surface is completely dry for the tape to adhere properly.
-
Apply the Insulation Tape:
- Cut a strip of insulation tape long enough to cover the entire perimeter of the edge where the plenum meets the opening.
- Carefully remove the backing to expose the adhesive side.
- Starting at a corner, meticulously apply the tape around the entire opening, ensuring there are no gaps.
- Smooth the tape down firmly with your hand to remove any wrinkles or air bubbles, ensuring a tight, secure seal. Apply additional layers of tape if necessary to cover any exposed metal or gaps, aiming for complete coverage that creates an insulated barrier.
- Replace the Air Vent: Carefully re-align your GREEN VENT air vent with the opening, ensuring it sits flush against the newly taped surface. Fasten the air vent back into place using its original screws, tightening them until the vent is secure and creates a tight seal against the insulation tape.
Maintenance Tip: Periodically check around your vents, especially during humid seasons. If you notice any new moisture, it might indicate a gap in the sealing that needs re-taping, or a larger HVAC issue that might require professional attention.
Ensure a Healthy & Efficient Home: Seal Your Vents with GREEN VENT Quality!

Don't let sweating vents compromise your home's air quality, aesthetic, or structural integrity. This simple, effective DIY sealing project is a vital step in maintaining a healthy, efficient living environment. By properly insulating and sealing the connections around your GREEN VENT aluminum air vents, you're protecting your investment in quality components and ensuring optimal performance of your entire HVAC system.
Ready to safeguard your home from hidden moisture issues?
👉 Explore GREEN VENT's collection of premium, rust-proof aluminum air vents today, and remember to pair them with proper sealing for lasting performance and a healthier home!


